About Aeternum Photography

Memphis, TN, United States
Thank you for visiting my site. My name is Joyce Wright. I am a Christian, a wife and a mother to one and I own one dog. I am based in Memphis, TN. Aeternum, the name I chose for my business is Latin for eternal. Photography is my hobby and passion. My goal is to capture the special moments in life and the little things that define people. I love capturing real emotions, love, joy and anything that is natural and unique to each client. My interest in photography was mainly sparked when I purchased my first Nikon camera in 2007. My leisurely pursuit in photography now turned into my main hobby and addiction was further ignited when our little girl was born in 2009. As I clicked away trying to capture every special moment of her life, I realized that I have a medium that could be explored. My camera of choice is a Nikon. I love its features, quality and its ease of use. 2009 was the birth year of Aeternum Photography. I L-O-V-E what I do and it is my hope that you can join my photography client family.

Contact Us

If you like what you see you may e-mail me at aeternumphotography@gmail.com. I would love to hear from you.

Pricing / FAQ

Click here for to see our prices and find answers to frequently asked questions.

Copyright

© All images contained herein are copyrighted and are the sole property of Aeternum Photography (Joyce Wright), 2009-2010. It is illegal to copy, save, or download images in any way.

Sunday, September 5, 2010

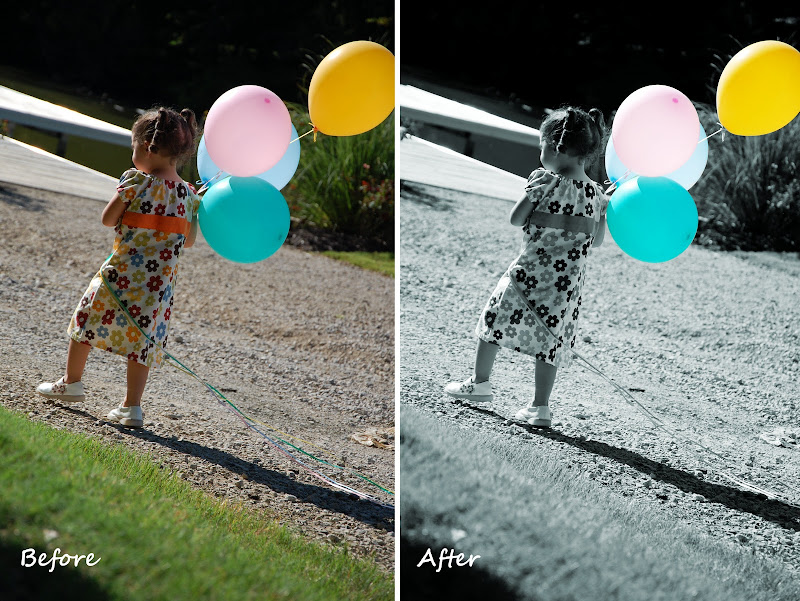
Photography Corner: Color Selection

Today's topic is Color Selection. Below are the steps I used to produce the "After" photo.

  1. Duplicate the image. (If you are a PC user your simply hold down the CTRL and D keys down)
  2. Covert the image to black and white. There are several ways to achieve this when using Gimp.
  3. Copy the black and white image and paste it on the original image
  4. On the Layer dialogue box right click on the Floating selection
  5. Select 'New Layer' from the menu
  6. Right click on the Pasted Layer from the Layer Dialogue box
  7. Click on the 'Add Layer Mask" Option
  8. Accept the dafault settings and click OK
  9. Using the Brush tool select the areas that you would like to see color
  10. Flatten Image (Image > Flatten Image) and Save.

No comments:

Post a Comment